If you need a quick way to find a phrase or word in the Wiki, press Ctrl F to bring up your internet browser's search bar.
What is UniStorm?
UniStorm is an incredibly powerful dynamic day and night weather system that creates AAA quality dynamically generated weather, lighting, and skies all at a blazing fast frame rate. UniStorm features over 300 customizable components allowing users to create any environment imaginable.
Getting Started
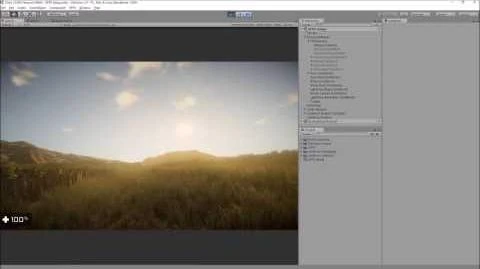
Setting up a dynamic day and night weather system has never been easier with UniStorm. If this is your first time using UniStorm, it is best to familiarize yourself with how everything works. Start off by testing out the many different example scenes we have supplied with UniStorm. Pick whichever one suits your needs/game style. These can be found under UniStorm>Demo Scenes. We have over 14 examples included to help you get the most out of UniStorm.
Testing the Demo Scenes
List of Included UniStorm Examples:
- Basic Example - A basic standard demo of UniStorm.
- Dynamic Snow Example - A demo that provides dynamically building snow on non-terrain objects.
- Plant Growth Example - A demo that provides dynamically growing plants based on a number of different factors.
- Save and Load Example - A demo that provides a working saving and loading system that allows you to save UniStorm's time, weather, date, and player's position and then load it at the point in which you saved.
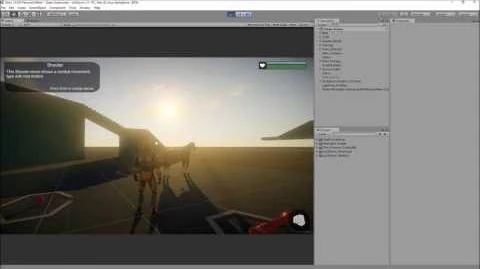
- Spawn Example - A demo that provides an example that allows a character to be spawned at runtime. All effects and components are then applied to UniStorm at runtime.
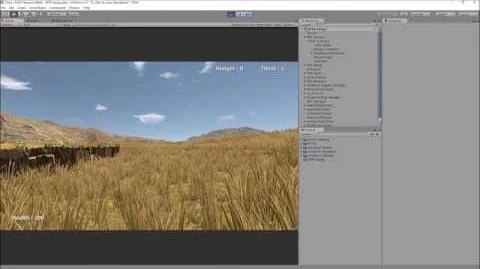
- Survival with Vitals Example - A demo that provides a survival example where a player is affected by UniStorm factors/variables such as temperature (Warmth), weather (Dryness), and time (hunger).
- Weather Forecaster Example - A demo that shows how to generate a weekly forecast for UniStorm using the Weather Forecaster system.
- Advanced UI Example - A demo showing an advanced UI that references UniStorm to display the current time, date, temperature, weather, season, moon phase, and more.
- Auto Save Example - A demo that show how to use an auto save system that saves the player's location and UniStorm variables. It can then be loaded at anytime to pick up where the player left off.
- Procedural Lightning Example - A demo that shows UniStorm 2.4's new lightning system with procedural lightning bolts and improved lightning light generation.
- Event Example 1 (Spawn Daily Object) - A demo that shows UniStorm 2.4's new event system spawning an object at a certain time of day.
- Event Example 2 (Random Daily Weather) - A demo that shows UniStorm 2.4's new event system spawning an object at a certain time of day.
- Event Example 3 (Enable and Disable Lights at Night) - A demo that shows UniStorm 2.4's new event system spawning an object at a certain time of day.
After you have tested the demo scenes and would like to customize your skies, you will need to familiarize yourself with the UniStorm Editor. This can be done one of two ways.
First, you can create your own system. To setup see the Create your Own UniStorm Weather System below.
Second, you can use the systems that are already in the UniStorm Demo Scenes. If you are picking this as your starting point, you can go ahead and skip to the UniStorm Editor section.
Creating your Own UniStorm Weather System
If you'd like to create your own weather system, it's best to follow the below tutorials and tutorial videos we've made. We recommend using the appropriate preset. The process is automatic and it only takes a couple seconds to have your scene ready for dynamic weather with day and night cycles. For you convenience, we have several presets for creating your own weather system.
Setting up UniStorm with a custom player (Standard Preset)
To create a UniStorm system for your player, open up the Auto Player Setup system (APS). This can be done by going to Window>UniStorm>Auto Player Setup C#.
This will open up the APS system and allow you to pick the appropriate preset for your character. By default, the Standard preset will be your first option. If you are using another character controller system, use the preset for that controller type. The Standard preset should work with most camera systems.
You will see an option to add a Player Object and a Camera Object. Simply apply your player and camera to the appropriate slots. Next, choose whether your player is using a First Person or a 3rd Person setup. Once finished, press Auto Setup Player. (Note: You must apply an object to all fields in order to continue). UniStorm will spawn all needed components, apply all needed effects, and setup your camera for you. Once this process is finished, your player will be setup and you will have UniStorm setup with your character and scene. If you are using Unity 5.4 or below, see the section below for applying your sun to the Environment Lighting. (This process is automatic for Unity 5.5. and above)
Setting up UniStorm with UFPS (UFPS Preset)
This video shows you a step by step process for setting up UFPS with UniStorm using the Auto Player Setup. The process is simple and automatic.
Setting Up UniStorm with UFPS
Setting up UniStorm with RFPS (RFPS Preset)
This video shows you a step by step process for setting up RFPS with UniStorm using the Auto Player Setup. The process is simple and automatic.
Setting Up UniStorm with RFPS
Setting up UniStorm with Opsive Third Person Controller (Opsive Third Person Controller Preset)
This video shows you a step by step process for setting up Opsive Third Person Controller with UniStorm using the Auto Player Setup. The process is simple and automatic.
Setting Up UniStorm with Opsive Third Person Controller
Setting up UniStorm with Invector Third Person Controller (Invector Third Person Controller Preset)
This video shows you a step by step process for setting up Invector Third Person Controller with UniStorm using the Auto Player Setup. The process is simple and automatic.

Setting Up UniStorm with Invector 3rd Person Controller
The UniStorm Editor
The UniStorm Editor is a power tool that allows you to adjust and control every component and color of the sky. While it may seem like a lot to take in at first, it won't take long to familiarize yourself with the Editor. For this section we will break the Editor down to the categories is which they're in. Note: The Climate Generation will be handled in a different part of the documentation. For more information on the Climate Generator, see the Climate Generator section of the documentation.
Time Options
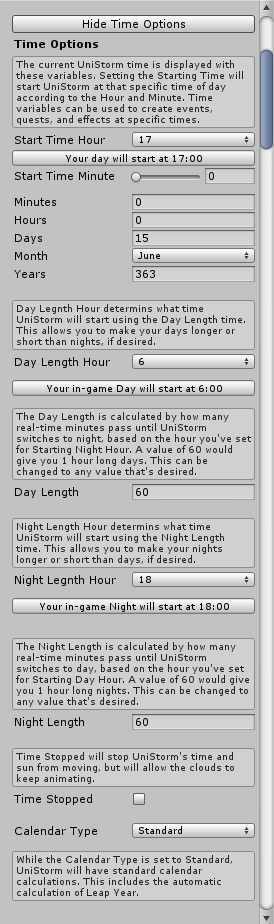
The Time Options allow you to adjust anything time related. This goes for Starting Time, Date, Day Length, Calendar Type, and more. Below we will discuss each UniStorm variable in this section in-depth with their functions and uses.
Date
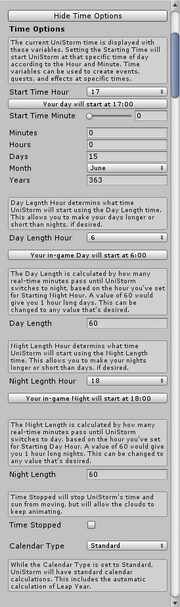
- Starting Hour - The Hour that UniStorm will start. This is in 24 hour notation and has a choice of the numbers between 0-23.
- Starting Minute - The minute that UniStorm will start. This consists of the numbers between 1-59.
- Day - The starting Day UniStorm will start on. Used by the calendar system UniStorm uses. If it's set to standard, it will take real-world calendar days into its calculations. So, any value above 31, with the appropriate month, will be calculated as the 1st of the following month.
- Month - The starting Month UniStorm will start on. Listed as actual months rather than numbers. This consists of the month from January-December.
- Year - The starting Year UniStorm will start on. The year value is unrestricted and can be any number desired. Note: While using the standard calendar system, UniStorm will still calculate Leap Year.
- Time Stopped - Stops UniStorm's time and sun from moving, but will allow the clouds to keep animating and weather to be generated.
Lengths
- Day Length - Calculated by how many real-time minutes pass until UniStorm switches to night, based on the hour you've set for Day Length Hour A value of 60 would give you 1 hour long days. This can be changed to any value that's desired.
- Day Length Hour - Determins what time UniStorm will start using the Day Length time. This allows you to make your days longer or short than nights, if desired.
- Night Length - Calculated by how many real-time minutes pass until UniStorm switches to day, based on the hour you've set for Night Length Hour A value of 60 would give you 1 hour long days. This can be changed to any value that's desired.
- Night Length Hour - Determins what time UniStorm will start using the Night Length time. This allows you to make your nights longer or short than days, if desired.
- Calendar Type - Controls whether UniStorm uses a Standard Calendar system (only affecting months and days) or a Custom Calendar System (Allowing the user to pick and choose how many days are in each month). While using the Standard Caledar setting, UniStorm will automatically calculation of Leap Year.
Weather Options
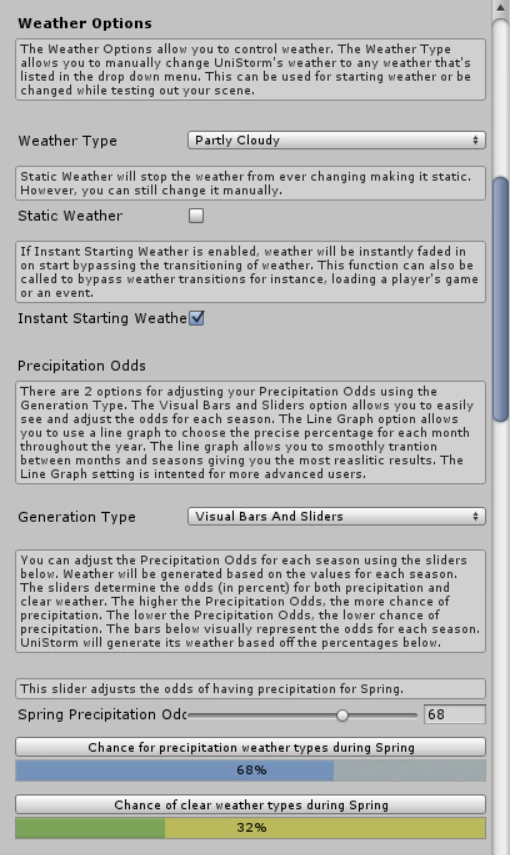
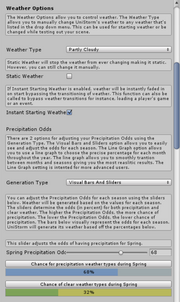
The Weather Options allow you to control UniStorm's weather related variables. The includes Weather Odds, Particle Colors, Weather Fade Speeds, and more. Below we will discuss each UniStorm variable in this section in-depth with their functions and uses.
Cloud Settings
- Cloud Speed - Controls the speed of regular clouds movement.
- Storm Cloud Speed - Controls the speed of storm clouds movement.
Weather Settings
- Weather Type - The weather that UniStorm will start with.
- Weather Odds - UniStorm's advanced weather generator will generate dynamic weather for your games. It includes two options; Visual Bars and Sliders and Line Graph. Each one will be explaine din-depth below.
- Visual Bars and Sliders (Simple) - Setting weather odds via the Visual Bars and Slider gives you simple control for the weather odds of each season. The sliders determine the odds (in percent) for both precipitation and clear weather. The higher the Precipitation Odds, the more chance of precipitation. The lower the Precipitation Odds, the lower chance of precipitation. The bars below visually represent the odds for each season. UniStorm will generate its weather based off the percentages below.
- Line Graph (Advanced) - Setting weather odds via the line graph gives you precise control over each month. The line graph consists of a Y value of 0 through 100. This Y value represents the percentage of precipitation chance. If you have a Y value of 10, there would be a 10% chance precipiation at this point. The X value represents each month from 1-12. This graph will seamlessly transition throughout the year. This advanced control allows weather odds to fade in between each month and allows you to make fronts or even follow real-world data from other graphs. This setting is meant for advanced users.
- Static Weather - Stops the weather from ever changing making it static. However, you can still change it manually through scripting, the Weather Command Prompt, or the UniStorm Editor.
- Instant Starting Weather - Weather will be instantly faded in on start bypassing the transitioning of weather. This function can also be called to bypass weather transitions for instance, loading a player's game or an event.
- Weather Fade Multiplier - The Weather Fade Multipler allows you to adjust the speed for fading in and out particle effects, sound effects, fog, light, and more. This affects the transition from clear weather types to precipitation weather types and vise versa.
Particle Color Control
The Particle Control Colors controls the color of UniStorm's particle effects for each time of day.This helps particles from being too bright or too dark during different times of day.
- Mist Color - Allows you to control the color UniStorm Mist Particle Effect for each time of day. Note: This color adjusts the mist color for both the Rain's Mist and the Snow's Mist.
- Rain Color - Allows you to control the color UniStorm Rain Particle Effect for each time of day.
- Snow Color - Allows you to control the color UniStorm Snow Particle Effect for each time of day.
Wind Options
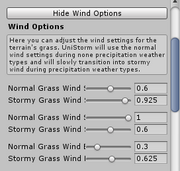
The Wind Options allow you to adjust UniStorm's dynamic wind settings. Note: These settings only apply to the terrain wind and only affects Unity's grass painted with the terrain tools. Below we will discuss each UniStorm variable in this section in-depth with their functions and uses.

Normal Wind Settings
The normal wind settings affect how the wind reacts during Non-Stormy precipitation types.
- Normal Grass Wind Speed - Adjusts the speed in which the grass waves.
- Normal Grass Wind Size - Adjusts the size of the wind that waves the grass.
- Normal Grass Wind Bending - Adjusts the strength in which the grass waves.
Storm Wind Settings
The normal wind settings affect how the wind reacts during Stormy precipitation types.
- Stormy Grass Wind Speed - Adjusts the speed in which the grass waves.
- Stormy Grass Wind Size - Adjusts the size of the wind that waves the grass.
- Stormy Grass Wind Bending - Adjusts the strength in which the grass waves.
Using Multiple Terrains
Controls whether or not UniStorm will use multiple terrains for controlling the terrain wind.
Atmosphere Options
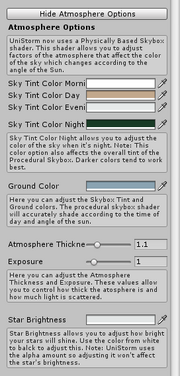
The Atmosphere Options allow you to adjust UniStorm's Physically Based Sky as well as the Star Settings. The Physically Based Sky shader allows you to adjust factors of the atmosphere that affect the color of the sky which changes according to the angle of the Sun. Below we will discuss each UniStorm variable in this section in-depth with their functions and uses.

Skybox Settings and Colors
The Sky Tint Color adjusts the tint of your sky according to the time of day and sun angle. Note: Some colors are calculated by the Physically Based Skybox shader itself. The tint you choose will also play a roll in this.
- Sky Tint Color Morning - Allows you to adjust the tint of the sky when it's Morning. Note: The whiter the color, the more orange sunrises you will have.
- Sky Tint Color Day - Allows you to adjust the color of the sky when it's Day.
- Sky Tint Color Evening - Allows you to adjust the color of the sky when it's Evening. Note: The whiter the color, the more orange sunsets you will have.
- Sky Tint Color Night - allows you to adjust the color of the sky when it's Night. Note: This color option also affects the overall tint of the Procedural Skybox. Darker colors tend to work best.
- Ground Color - The color of the Skybox ground.
- Atmosphere Thickness - Controls how high your horizon shading is calculated. For best results this should be adjusted very lightly (at 0.1 increments)
- Exposure - Control how thick the atmosphere is and how much light is scattered. This affects the overall brightness of your sky. For best results this should be adjusted very lightly (at 0.1 increments)
Star Settings
UniStorm's stars are only visible during twilight and night.
- Star Brightness (Gradient) - Controls the brightness and tint color of your stars. Note: The gradient color control allows you to pick the exact time the stars will fade in and out for day and night.
- Star Scroll Speed - Controls the speed that of star movement.
- Star Rotation Speed - Controls the speed of the star's rotation speed.
Fog Options
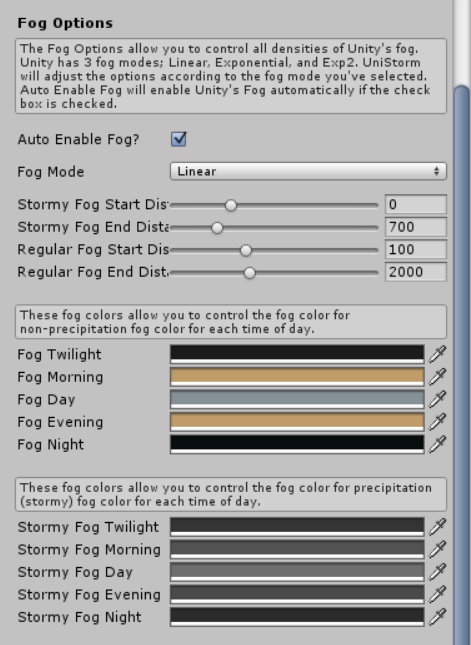
The Fog Options allow you to control all densities of Unity's fog. Unity has 3 fog modes; Linear, Exponential, and Exp2. UniStorm will adjust the options according to the fog mode you've selected. Note: In order to have proper fog, a Global Fog Image Effect on your camera is required. Below we will discuss each UniStorm variable in this section in-depth with their functions and uses.

Fog Mode
- Auto Enable Fog - Enables Unity's Fog automatically, if the check box is checked.
- Fog Mode - Allows you to choose 1 of 3 fog modes; Linear, Exponential, and Exp2. These modes are purely preference. However, we have the best results with Linear.
Fog Densities
- Regular Fog Start Distance - The distance your fog will start when using non-precipitation weather types.
- Regular Fog End Distance - The distance your fog will end when using non-precipitation weather types.
- Stormy Fog Start Distance - The distance your fog will start when using precipitation, or Fog, weather types.
- Stormy Fog End Distance - The distance your fog will end when using precipitation, or Fog, weather types.
Fog Colors
Controls the color of UniStorm's fog for each time of day. Note: In order to have proper fog, a Global Fog Image Effect on your camera is required.
The regular fog UniStorm uses from all non-precipitation weather types, excluding fog.
- Fog Morning - Controls the color of the fog color in the Morning.
- Fog Day - Controls the color of the fog color in the Day.
- Fog Evening - Controls the color of the fog color in the Evening.
- Fog Night - Controls the color of the fog color in the Night.
Stormy fog only happens with precipitation and fog weather types.
- Stormy Fog Morning - Controls the color of the stormy fog color in the Morning.
- Stormy Fog Day - Controls the color of the stormy fog color in the Day.
- Stormy Fog Evening - Controls the color of the stormy fog color in the Evening.
- Stormy Fog Night - Controls the color of the stormy fog color in the Night.
Lightning Options
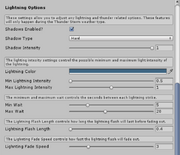
Lightning Options allow you to adjust any lightning and thunder related options. These features will only happen during the Thunder Storm weather type. Below we will discuss each UniStorm variable in this section in-depth with their functions and uses.

Light Settings
- Shadows Enabled - Controls whether or not your lightning light uses shadows.
- Shadow Type - If shadows are enabled, this controls the shadow type which consists of two types (Hard or Soft).
- Shadow Intensity - Controls the intensity of the lightning's shadows.
- Lightning Intensity Min - The minimum light that will be generated with a lightning strike. Note: UniStorm will generate randomized lighting intensities within the range of your Minimum and Maximum values.
- Lightning Intensity Max - The maximum light that will be generated with a lightning strike. Note: UniStorm will generate randomized lighting intensities within the range of your Minimum and Maximum values.
- Lightning Flash Length - Controls how quickly lightning flashes dissipate.
Odds Settings
- Min Wait - The minimum time that a lightning strike will be generated. Note: UniStorm will generate randomized lightning strike within the range of your Minimum and Maximum values.
- Max Wait - The maximum time that a lightning strike will be generated. Note: UniStorm will generate randomized lightning strike within the range of your Minimum and Maximum values.
Sounds
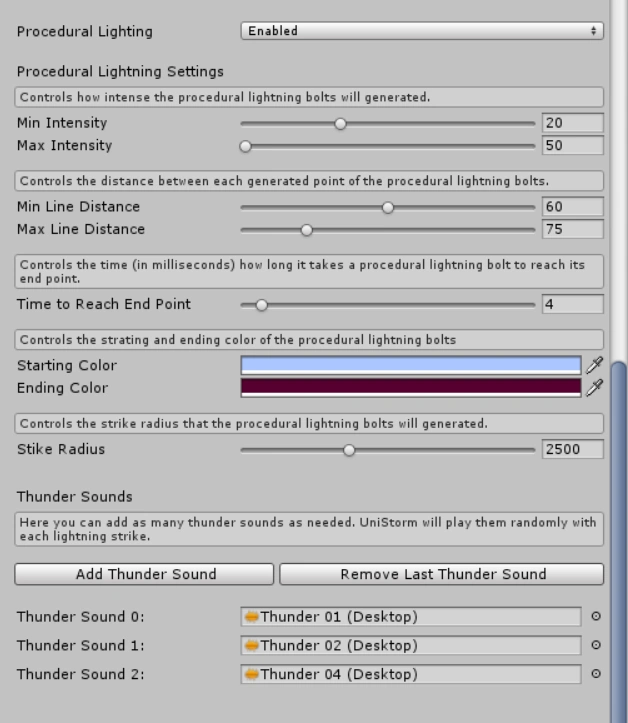
- Thunder Sounds - You can add and remove lightning sounds by pressing the Add and Remove buttons. UniStorm will randomly play one of the lightning sounds when lightning strike happens.
Procedural Lightning

- Procedural Lightning - Controls whether or not UniStorm uses procedural lightning.
- Min and Max Intensity - Controls how intense the procedural lightning bolts will generated.
- Min and Max Width - Controls how wide the procedural lightning bolts will be generated.
- Min and Max Line Distance - Controls the distance between each generated point of the procedural lightning bolts.
- Time to Reach End Point - Controls the time (in milliseconds) how long it takes a procedural lightning bolt to reach its end point.
- Starting and Ending Color - Controls the starting and ending color of the procedural lightning bolts
- Strike Radius - Controls the strike radius that the procedural lightning bolts will generated.
Temperature Options
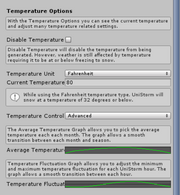
With the Temperature Options you can see the current temperature and adjust many temperature related settings. Below we will discuss each UniStorm variable in this section in-depth with their functions and uses.

Temperature Mode
The Temperature Mode allows you to choose whether UniStorm uses Fahrenheit or Celsius.
- Fahrenheit - Allows UniStorm to use the Fahrenheit temperature system. UniStorm will also use this for generating temperatures using the Climate Generator. Note: While using the Fahrenheit temperature type, UniStorm will snow at a temperature of 32 degrees or below, if there is precipitation.
- Celsius - Allows UniStorm to use the Celsius temperature system. UniStorm will also use this for generating temperatures using the Climate Generator. Note: While using the Celsius temperature type, UniStorm will snow at a temperature of 0 degrees or below, if there is precipitation.
Temperature Control (Simple)
Here you can adjust the minimum and maximum temperature for each season. UniStorm will generate realistic temperature fluctuations according to your minimum and maximums. This is done both hourly and daily. Using the Climate Generation tool, it is now possible to generate realistic temperatures based off real-world data with the climate of a button. However, users are free to adjust the temperature settings as they please.
- Starting Spring Temperature - The temperature that Spring will start on. Note: If you are using the Climate Generator, this is calculated for you by averaging your Min and Max temperature for Spring.
- Min Spring Temperature - The minimum temperature that can be reached during the Spring season.
- Max Spring Temperature - The maximum temperature that can be reached during the Spring season.
- Starting Summer Temperature - The temperature that Summer will start on. Note: If you are using the Climate Generator, this is calculated for you by averaging your Min and Max temperature for Summer.
- Min Summer Temperature - The minimum temperature that can be reached during the Summer season.
- Max Summer Temperature - The maximum temperature that can be reached during the Summer season.
- Starting Fall Temperature - The temperature that Fall will start on. Note: If you are using the Climate Generator, this is calculated for you by averaging your Min and Max temperature for Fall.
- Min Fall Temperature - The minimum temperature that can be reached during the Fall season.
- Max Fall Temperature - The maximum temperature that can be reached during the Fall season.
- Starting Winter Temperature - The temperature that Winter will start on. Note: If you are using the Climate Generator, this is calculated for you by averaging your Min and Max temperature for Winter.
- Min Winter Temperature - The minimum temperature that can be reached during the Winter season.
- Max Winter Temperature - The maximum temperature that can be reached during the Winter season.
- Current Temperature - The current temperature while the scene is running.
Temperature Control (Advanced)
The Advanced Temperature Settings allow you to control the Average Temperature Graph. The Y value represnts the desired temperature and the X value represents the month. This allows you to pick the average temperature each each month and allows a smooth transition between each month and season.
- Average Temperature -
The Y value of the Average Temperature Graph represnts the desired temperature and the X value represents the month. This allows you to pick the average temperature each each month and allows a smooth transition between each month and season.
- Temperature Fluctuation -
Temperature Fluctuation Graph allows you to adjust the minimum and maximum temperature fluctuation for each UniStorm hour. The Y value represnts the fluctuation amount and the x value represents the hour. The graph allows a smooth transition between each hour.
Sun Options
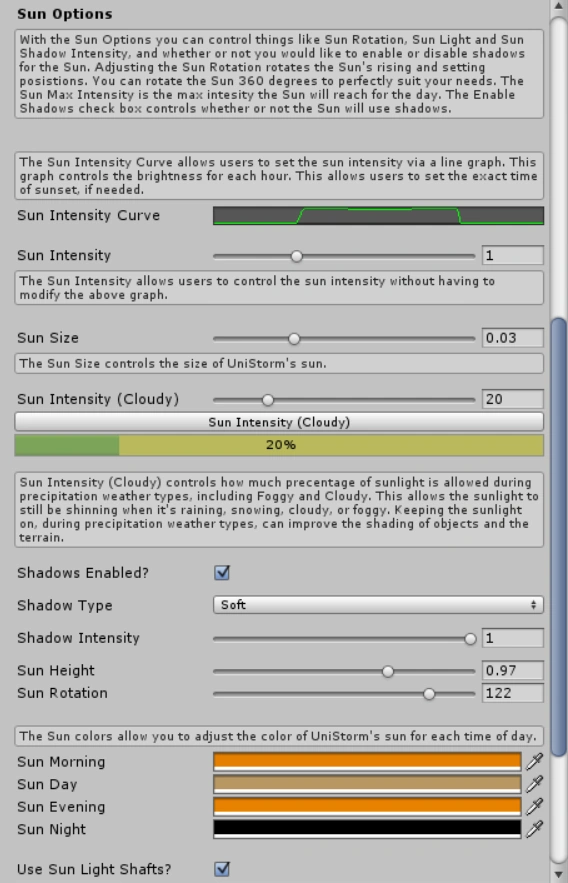
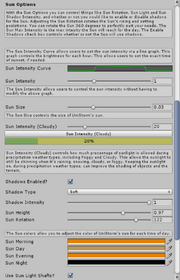
With the Sun Options you can control things like Sun Rotation, Sun Light and Sun Shadow Intensity, and whether or not you would like to enable or disable shadows for the Sun. Adjusting the Sun Rotation rotates the Sun's rising and setting positions. You can rotate the Sun 360 degrees to perfectly suit your needs. The Sun Max Intensity is the max intensity the Sun will reach for the day. The Enable Shadows check box controls whether or not the Sun will use shadows. Below we will discuss each UniStorm variable in this section in-depth with their functions and uses.
Light Settings
Here you can adjust any Sunlight related options.
- Sun Intensity Curve (Advanced) - The Sun Intensity Curve allows users to set the sun intensity via a line graph. This graph controls the brightness for each hour. This allows users to set the exact time of sunsets and sunrises, if needed.
- Sun Intensity - This setting increases the sun intensity without having to adjust above line graph.
- Sun Intensity (Cloudy) - This controls the percentage of sunlight that is allowed during precipitation weather types, including Foggy and Cloudy. This allows the sunlight to still be shinning when it's raining, snowing, cloudy, or foggy. Keeping the sunlight on, during precipitation weather types, can improve the shading of objects and the terrain.
- Sun Size - This setting adjusts the size of UniStorm's Sun and has a value of 0.0 - 0.1.
- Sun Rotation - Adjusts the rotation of UniStorm's Sun allowing it to be rotated 360 degrees.
Shadow Settings
Here you can adjust the shadow options of UniStorm's Sunlight.
- Shadows Enabled - Controls whether UniStorm's Sun uses shadows. (Enabled or Disabled)
- Shadow Type - Controls the shadow type of UniStorm's Sun. (Soft or Hard)
- Shadow Intensity - Controls the intensity of UniStorm's Sun's shadows.
Color Settings
Allows you to adjust the colors of UniStorm's Sun.
- Sun Colors - The Sun Color Settings allow you to adjust the color of UniStorm's sun for each time of day
- Sunshaft Colors - The Sunshaft colors allow you to adjust the sunshaft colors for each time of day.
- Sun Light Shafts - Use Sun Light Shafts controls whether or not UniStorm will use light shafts with UniStorm's sun.
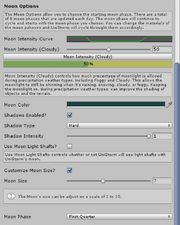
Moon Options
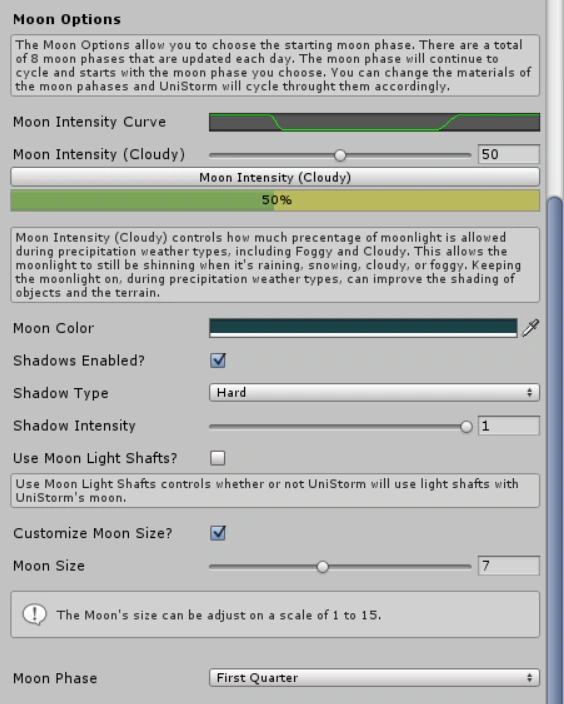
The Moon Options allow you to adjust all moon related options. There are a total of 8 moon phases that are updated each day. The moon phase will continue to cycle and starts with the moon phase you choose. You can change the materials of the moon phases and UniStorm will cycle through them accordingly. Below we will discuss each UniStorm variable in this section in-depth with their functions and uses.
Light Settings
Here you can adjust any Moonlight related options.
- Moon Intensity Curve (Advanced) - The Moon Intensity Curve allows users to set the moon intensity via a line graph. This graph controls the brightness for each hour. This allows users to set the exact time the moonlight will fade in and out, if needed.
- Moon Intensity - This setting increases the moon intensity without having to adjust above line graph.
- Moon Intensity (Cloudy) - This controls the percentage of moonlight that is allowed during precipitation weather types, including Foggy and Cloudy. This allows the moonlight to still be shinning when it's raining, snowing, cloudy, or foggy. Keeping the moonlight on, during precipitation weather types, can improve the shading of objects and the terrain.
Shadow Settings
The Shadow Settings allow to you to adjust all of UniStorm's moon's shadow factors.
- Shadows Enabled - Controls whether UniStorm's Moon uses shadows. (Enabled or Disabled)
- Shadows Type - Controls the shadow type of UniStorm's Moon. (Soft or Hard)
- Shadows Intensity - Controls the intensity of UniStorm's Moon's shadows.
Moon Customization
Moon Customization allows you to adjust certain settings for UniStorm's moon object.
- Customize Moon Size - A choice of whether or not you want to customize UniStorm's Moon size. (Enabled or Disabled)
- Customize Moon Rotation - A choice of whether or not you want to customize UniStorm's Moon rotation. (Enabled or Disabled)
- Moon Size - Controls the size of UniStorm's Moon.
- Moon Rotation - Controls the rotation of UniStorm's Moon. This setting allows UniStorm's Moon to be rotated 360 degrees.
- Moon Phase - Controls the starting Moon Phase UniStorm will start with. It will then continue to cycle through the phases from the phase it starts on.
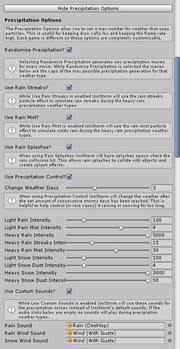
Precipitation Options
The Precipitation Options allow you to adjust all precipitation related settings. Below we will discuss each UniStorm variable in this section in-depth with their functions and uses.

Enable and Disable Certain Features
Here you can pick and choose which precipitation features you want UniStorm to use.
- Use Randomize Precipitation - When enabled, UniStorm generates new precipitation maxes for every storm. While Randomize Precipitation is selected the maxes below are the caps of the max possible precipitation generation for that weather type.
- Use Rain Streaks - When enabled, UniStorm will use the rain streaks particle effect to simulate rain streaks during the heavy rain precipitation weather types.
- Use Rain Mist - When enabled, UniStorm will use the rain mist particle effect to simulate windy rain during the heavy rain precipitation weather types.
- Use Rain Splashes - When enabled, UniStorm will have splashes spawn where the rain collisions hit. This allows rain splashes to collide with objects and create splash effects.
- Use Precipitation Control - When enabled, UniStorm will enable an option to change the weather after the set amount of consecutive stormy days has been reached. This is helpful to help control (in rare cases) it raining or snowing for too long.
- Change Weather Days - The amount of days needed for a weather change if there's precipitation equal to Change Weather Days amount.
Particle Intensities
The Particle Intensities allow you to set a max number for weather that uses particles. This is useful for keeping draw calls low and keeping the frame rate high. Each game is different so these options are completely customizable. Note: It will only snow if it is 32 degrees Fahrenheit or below |OR| 0 degrees Celsius or below.
- Light Rain Intensity - The maximum intensity the Rain particle will reach during the Light Rain weather type.
- Light Rain Mist Intensity - The maximum intensity the Rain Mist particle will reach during the Light Rain weather type.
- Heavy Rain Intensity - The maximum intensity the Rain particle will reach during the Thunder Storm and Heavy Rain weather types.
- Heavy Rain Streaks Intensity - The maximum intensity the Rain Streaks particle will reach during the Thunder Storm and Heavy Rain weather types.
- Heavy Rain Mist Intensity - The maximum intensity the Rain Mist particle will reach during the Thunder Storm and Heavy Rain weather types.
- Light Snow Intensity - The maximum intensity the Snow particle will reach during the Light Snow weather type.
- Light Snow Dust Intensity - The maximum intensity the Snow Dust particle will reach during the Light Snow weather type.
- Heavy Snow Intensity - The maximum intensity the Snow particle will reach during the Heavy Snow weather type.
- Heavy Snow Dust Intensity - The maximum intensity the Snow Dust particle will reach during the Heavy Snow weather type.
Sound Settings
Sounds can only be customized if Use Custom Sounds is enabled If enabled, UniStorm will use these sounds for the precipitation noises instead of UniStorm's default sounds. If the audio slots below are empty no sounds will play during precipitation weather types.
- Rain Sound - The Rain sound that UniStorm will use for all rain precipitation weather types.
- Rain Wind Sound - The Wind sound that UniStorm will use for all rain precipitation weather types.
- Snow Wind Sound - The Wind sound that UniStorm will use for all snow precipitation weather types.
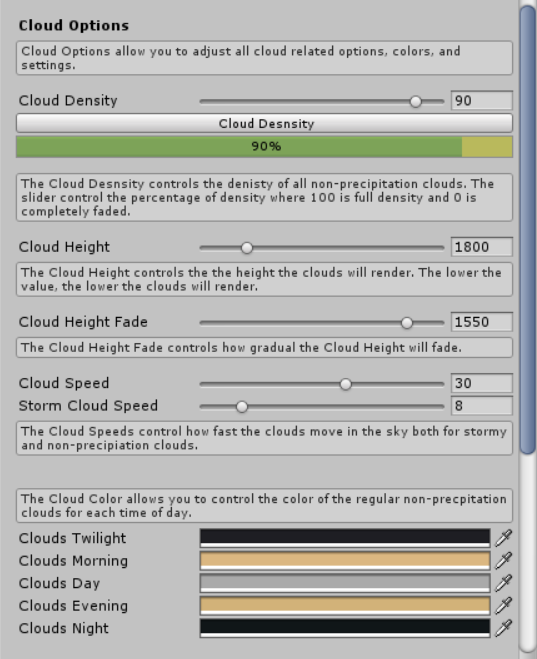
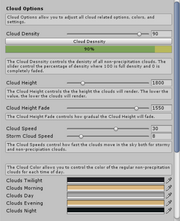
Cloud Options
Cloud Options allow you to adjust all cloud related options, colors, and settings.
Cloud Settings
- Cloud Density - The Cloud Density controls the density of all non-precipitation clouds. The slider control the percentage of density where 100 is full density and 0 is completely faded.
- Cloud Height - The Cloud Height controls the the height the clouds will render. The lower the value, the lower the clouds will render.
- Cloud Height Fade - The Cloud Height Fade controls how gradual the Cloud Height will fade. Note: It is recommended that you have your terrain and scene at or around 0 for best results.
- Cloud Speed - The Cloud Speeds control how fast the clouds move in the sky both for non-precipitation clouds.
- Storm Cloud Speed - The Storm Cloud Speeds control how fast the clouds move in the sky both for stormy clouds.
Cloud Colors
- Cloud Colors - The Cloud Color allows you to control the color of the regular non-precipitation clouds for each time of day.
- Storm Cloud Colors - The Storm Cloud Color allows you to control the color of the stormy clouds that UniStorm uses when it has precipitation for each time of day. There are 2 layers of clouds each with their own color control values.
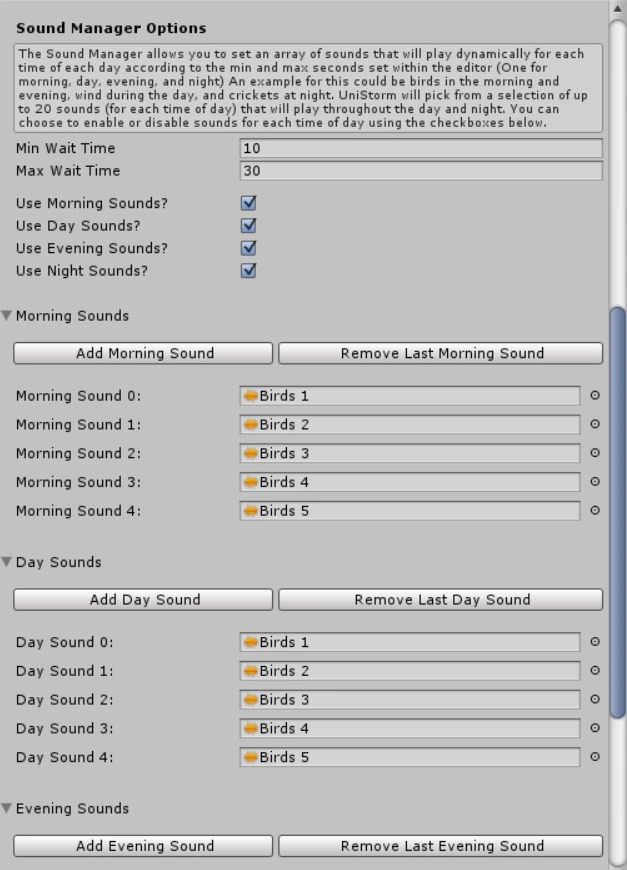
Sound Manager Options
The Sound Manager allows you to set an array of sounds that will play dynamically for each time of each day according to the min and max seconds set within the editor (One for morning, day, evening, and night) An example for this could be birds in the morning and evening, wind during the day, and crickets at night. UniStorm will pick from a selection of as many sounds as needed (for each time of day) that will play throughout the day and night. You can choose to enable or disable sounds for each time of day using the checkboxes below. Below we will discuss each UniStorm variable in this section in-depth with their functions and uses.
Delay
The delay that the Sound Manager System uses to play dynamic sounds.
- Min Wait Time - The Minimum time needed to generate a successful sound. Note: UniStorm will generate a successful sound play based off the minimum and maximum Wait Times.
- Max Wait Time - The Maximum time needed to generate a successful sound. Note: UniStorm will generate a successful sound play based off the minimum and maximum Wait Times.
Enable Sounds for Certain Times of Day
Enable or disable dynamic sound playing for each time of day.
- Use Morning Sounds - If enabled, UniStorm will play dynamic sounds for Morning. Morning consists of the hours from 5:00 am to 7:59 am.
- Use Day Sounds - If enabled, UniStorm will play dynamic sounds for Day. Day consists of the hours from 9:00 am to 3:59 pm.
- Use Evening Sounds - If enabled, UniStorm will play dynamic sounds for Evening. Evening consists of the hours from 5:00 pm to 7:00 pm.
- Use Night Sounds - If enabled, UniStorm will play dynamic sounds for Night. Night consists of the hours from 8:00 pm to 3:00 am.
Sounds
An adjustable list of sounds for each time of day.
- Add and Remove Morning Sound - Add and remove sounds that will play for Morning.
- Add and Remove Day Sound - Add and remove sounds that will play for Day.
- Add and Remove Evening Sound - Add and remove sounds that will play for Evening.
- Add and Remove Night Sound - Add and remove sounds that will play for Night.
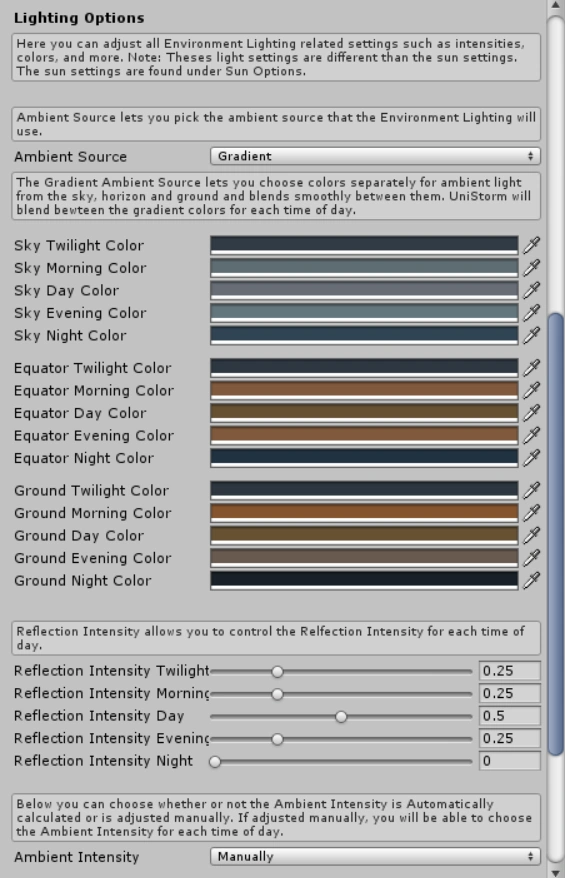
Lighting Options
The Lighting Options allow you to adjust all Environment Lighting related settings such as intensities, colors, and more. Note: These light settings are different than the sun settings. The sun settings are found under Sun Options.

Ambient Source
Ambient Source lets you pick the ambient source that the Environment Lighting will use.
- Color - The Color Ambient Source simply uses a flat color for all ambient light in the scene. UniStorm will blend between these colors for each time of day.
- Ambient Light Color - Controls the color of the Ambient Light for each time of day.
- Gradient - The Gradient Ambient Source lets you choose colors separately for ambient light from the sky, horizon and ground and blends smoothly between them. UniStorm will blend between the gradient colors for each time of day.
- Sky Color - Controls the color of the Sky in Unity's Environment Lighting for each time of day.
- Equator Color - Controls the color of the Equator in Unity's Environment Lighting for each time of day.
- Ground Color - Controls the color of the Ground in Unity's Environment Lighting for each time of day.
- Skybox - The Skybox Ambient Source uses the colors of the skybox to determine the ambient light coming from different angles.
Reflection Settings
The Reflection Settings allow you to control Unity's reflection about for each time of day.
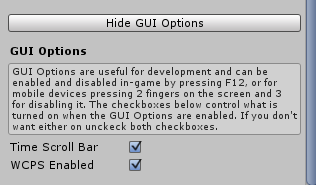
GUI Options (Located in Object Options)
GUI Options are useful for development and can be enabled and disabled in-game by pressing the U key (this has been updated from what was originally F12), or for mobile devices pressing 2 fingers on the screen and 3 for disabling it. The checkboxes below control what is turned on when the GUI Options are enabled. If you don't want either on uncheck both checkboxes. Below we will discuss each UniStorm variable in this section in-depth with their functions and uses.

Enable or Disable GUI Features
- Time Scroll Bar - Controls whether or not Time Scroll Bar feature is enabled. If enabled, it allows you to to control UniStorm's time of day with a slider.
- WCPS Enabled - Controls whether or not WCPS feature is enabled. If enabled, WCPS can be very useful for testing and development purposes. It allows you to change the weather in game using a GUI system with certain codes. This could be useful if you wanted a GM to have power over the weather in case they ever needed to change it. We have supplied a list below with all the command codes for the WCPS.
UniStorm Events
With UniStorm Events, users will finally be able to create events based off of UniStorm's time and weather (weather events coming soon) using customized Unity Events. The UniStorm Event system makes it easy to create custom UniStorm related events using Unity's UnityEvent system. This gives users the power to create an endless amount of events all within the UniStorm Editor. We have added a new tab to the UniStorm Editor called UniStorm Events to manage all UniStorm Events. This allows you to trigger your events from many UniStorm related variables such as time, weather, dates, day of the week, and temperature. However, only Time UniStorm Events will be released with the 2.4.0 update. Weather Events will come shortly after.
UniStorm Events are triggered by calling another script's public function, as shown below. This can be any script and allows you to have time related events without having to program them into your scripts. UniStorm's Time Events allow you to specify the exact time an event happens and can be called hourly, daily, monthly, and even yearly. This opens up many possibilities with what you with gameplay and game management.
UniStorm Events will be in open beta until UniStorm 2.4.1. We have tons planned for this feature and we look forward to what can be achieved with it. UniStorm Events do not have to be used and are completely optional. If you have any feedback or suggestions please post them here.
Creating a UniStorm Event
A tutorial on creating UniStorm Events can be found on the tutorial section of the UniStorm Wiki site here: UniStorm Tutorials
Import/Export Settings
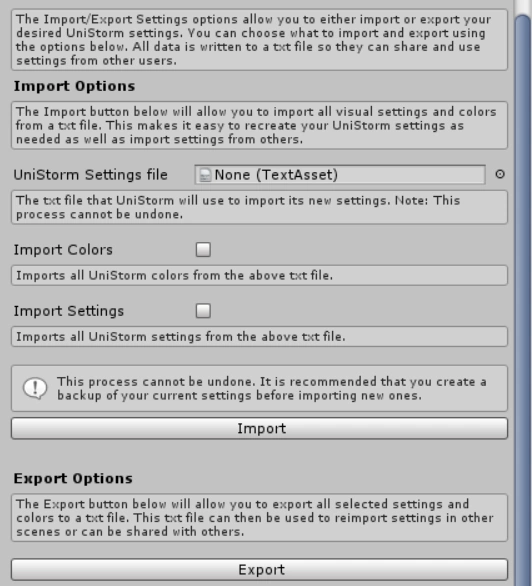
UniStorm now has a new awesome feature. This new feature is located within the UniStorm Editor with the tab Import Export Settings. The Import/Export Settings options allow you to either import or export your desired UniStorm settings. You can choose to import Colors and/or settings. When exporting, all data is written to a txt file so they can share and use settings from other users. Best of all, the export feature can be used during runtime. This allows you to adjust UniStorm's settings so you can see all the changes.

Import Options
The Import button below will allow you to import all visual settings and colors from a txt file. This makes it easy to recreate your UniStorm settings as needed as well as import settings from others.
UniStorm Settings File
UniStorm Settings File - The txt file that UniStorm will use to import its new settings. Note: This process cannot be undone and should not be done during runtime.
Import Colors
Import Colors - Imports all UniStorm colors from the UniStorm Settings file. Note: This will import all colors that UniStorm uses and will overwrite your current colors.
Import Settings
Import Settings - Imports all UniStorm settings from the above txt file. Note: These settings are UniStorm's visual settings and do not affect project specific settings like the Time Options, Object Options, Wind Options, Lightning Options, Precipitation Options, Climate Options, and Sound Manager Options.
Import Button
Import Button - Imports the settings from the txt file that's currently applied to the UniStorm Settings File.
Export Options
The Export button below will allow you to export all visual settings and colors to a txt file. This makes it easy to edit your UniStorm system during runtime and export the desired settings.
Export Button
Export Button - Exports the settings that UniStorm is currently using. This can be used during runtime.
Climate Generator
UniStorm's Climate Generator makes it easy to generate a realistic climate to suit your terrain/environment's needs. It works by generating realistic climates based off of real-world data. This includes Precipitation, realistic Seasonal Temperatures with seasonal averages generation, weather odds (deserts have less rain and rainforests have more), starting weather, starting season, and much more. This will all be generated according to realistic real-world data according to the specific Climate, but will be different every time. This is all done with the click of a button and UniStorm does the rest. Below we will discuss each UniStorm variable in this section in-depth with their functions and uses.
Precautions
It should be noted that generating a new climate will overwrite your previous climate settings. However, you can always revert back to UniStorm's original default settings/climate.
Climate Generation Types
There are 6 Climates to choose from Random, Rainforest, Desert, Mountainous, and Grasslands (with more to come). We will discuss each one below.
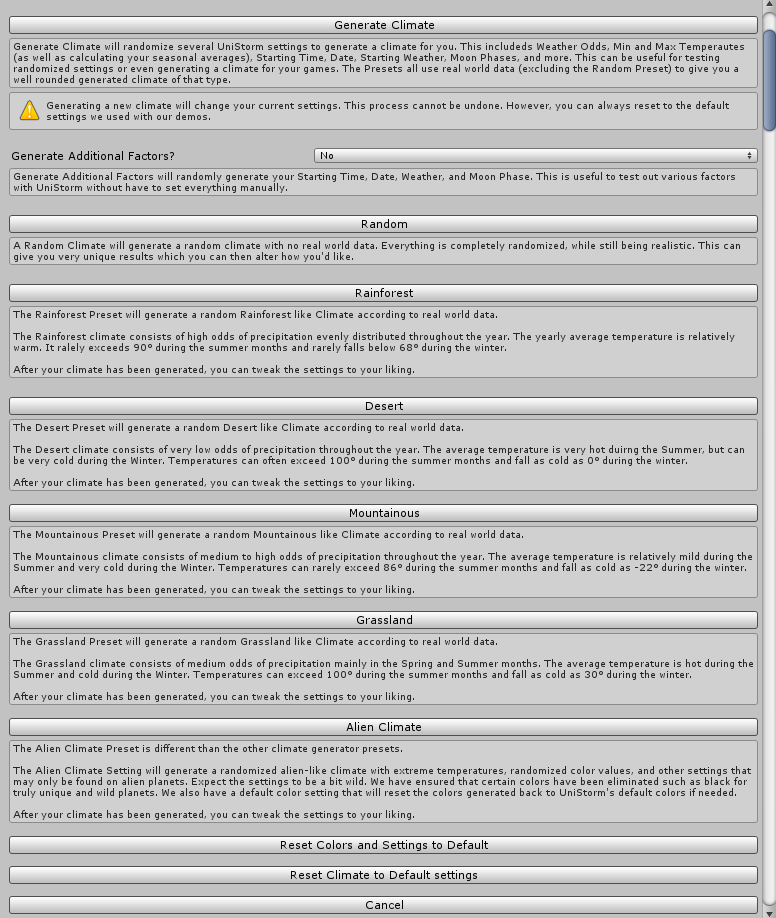
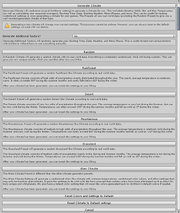
- Random Climate - Generates a random climate with no real world data. Everything is completely randomized, while still being realistic. This can give you very unique results which you can then alter how you'd like.
- Rainforest Climate - Generates a random Rainforest like Climate according to real world data. The Rainforest climate consists of high odds of precipitation evenly distributed throughout the year. The yearly average temperature is relatively warm. It rarely exceeds 90° during the summer months and rarely falls below 68° during the winter. After your climate has been generated, you can tweak the settings to your liking.
- Desert Climate - Generates a random Desert like Climate according to real world data. The Desert climate consists of very low odds of precipitation throughout the year. The average temperature is very hot duirng the Summer, but can be very cold during the Winter. Temperatures can often exceed 100° during the summer months and fall as cold as 0° during the winter. After your climate has been generated, you can tweak the settings to your liking.
- Mountainous Climate - Generates a random Mountainous like Climate according to real world data. The Mountainous climate consists of medium to high odds of precipitation throughout the year. The average temperature is relatively mild during the Summer and very cold during the Winter. Temperatures can rarely exceed 86° during the summer months and fall as cold as -22° during the winter.After your climate has been generated, you can tweak the settings to your liking.
- Grassland Climate - Generates a random Grassland like Climate according to real world data. The Grassland climate consists of medium odds of precipitation mainly in the Spring and Summer months. The average temperature is hot during the Summer and cold during the Winter. Temperatures can exceed 100° during the summer months and fall as cold as 30° during the winter. After your climate has been generated, you can tweak the settings to your liking.
- Alien Climate - The Alien Climate Preset is different than the other climate generator options.The Alien Climate Setting will generate a randomized alien-like climate with extreme temperatures, randomized color values, and other settings that may only be found on alien planets. Expect the settings to be a bit wild. We have ensured that certain colors have been eliminated such as black for truly unique and wild planets. We also have a default color setting that will reset the colors generated back to UniStorm's default colors if needed. After your climate has been generated, you can tweak the settings to your liking.
Additional Options and Tools
- Generate Additional Factors - Will also generate your Starting Time, Date, Weather, and Moon Phase. This is useful to test out various factors with UniStorm without have to set everything manually.
- Reset Colors and Settings to Default - Resets UniStorm's climate settings, colors, date, time, and many other settings to the original demo settings.
- Reset Climate to Default Settings - Resets UniStorm's climate settings to the original demo settings.
Temperature Types
The Temperature Type is located in a different section to that of the Climate Generator. To choose between Fahrenheit and Celsius temperature types, see the Temperature Mode section. Note: Once you've changed your temperature mode, you will need to regenerate your climate using the Climate Generator in order for the temperature mode to update your temperatures.
Climate Zones
While climate generation for a whole terrain is great, some of you have requested having controllable factors for specific areas of your terrain. This is why we are also creating a new system called Climate Zones. It will work by using trigger areas to switch climates. When your players hit these Climate Zones, it changes UniStorm's climate. So, if your terrain has a mountain section, and you'd like the climate to be Mountainous, you would simple generate a Mountainous Climate Zone for your mountains and place the zone over your mountains. When your player exits, or enters a new Climate Zone, UniStorm can then switch to it. Multiple Climate Zones can be used throughout your terrain allowing. Below we will discuss each UniStorm variable in this section in-depth with their functions and uses.
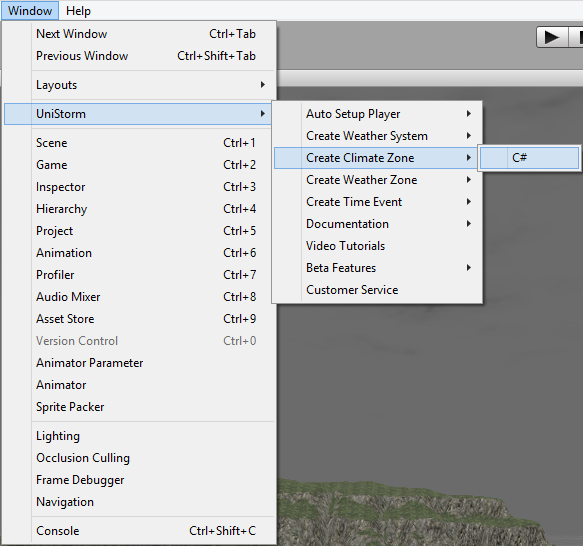
Creating a Climate Zone
Creating a Climate Zone is easy. Go to Windows>UniStorm>Create Weather Zone>C#
Note: Current C# is only supported. This will not work for the JS version of UniStorm.

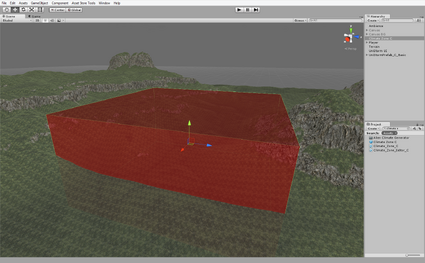
Once selected, this will spawn a Climate Zone in your scene at the position of (0,0,0). You may rearrange this as needed.

You will notice that the Climate Zone consists of a large colored box. This box is the area that the climate zone will affect when it is using the Trigger detection type. See the Detection Type section for more information regarding the trigger type. If you're using the Height detection type, the size of this box doesn't matter. This colored box is only visible within the scene view and isn't visible in-game.
Now that you have spawned a Climate Zone, you are ready to tweak your climate using the Climate Options below.
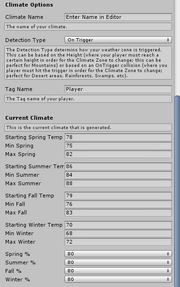
Climate Options
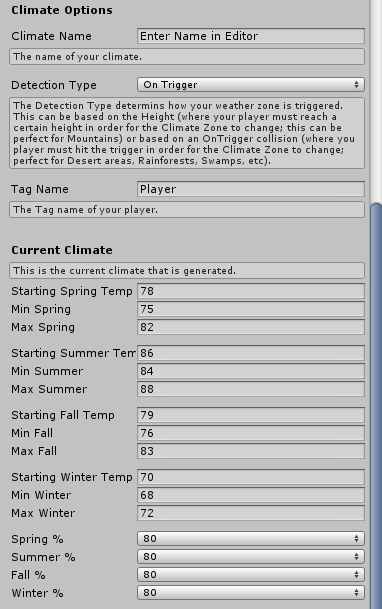
Climate Options allow you to control all of a Climate Zone's temperatures for each season. A Climate Zone's settings only affect the selected Climate Zone making each Climate Zone independent. A Climate Zone will only trigger once the Detection Type is met.
Climate Name
This is the name of your Climate Zone. This makes it easier to keep track of your Climate Zones. For instance, this can be the name of a certain region, environment, zone, etc.
Detection Type
The Detection Type determines how your weather zone is triggered. This can be based on the Height (where your player must reach a certain height in order for the Climate Zone to change; this can be perfect for Mountains) or based on an OnTrigger collision (where you player must hit the trigger in order for the Climate Zone to change; perfect for Desert areas, Rainforests, Swamps, etc).
Tag Name
The tag that triggers the OnTrigger Detection Type. Note: This option will only become available once the Detection Type is set to Trigger.
Current Climate
The Current Climate consists of the climate that will take over once a player has met the detection type. These cane be set manually or they can be set using the Climate Generator. For more information on generatiing climates, see the Climate Generator section. (Note: This portion of the system works the same as it does for the Climate Generation). For more information on temperature settings, see the Setting Temperatures section.